David-mccann made a fancy LightBox powered by an ESP8266 module and controlled via a smartphone app. It uses your phone’s or tablet’s built-in microphone to analyze the surrounding music and generates beautiful light patterns matching with the music. All you need to do is to start the app, place the phone near your music system and the LightBox will visualize the sound in real-time. It can also be used a colorful ambient light.
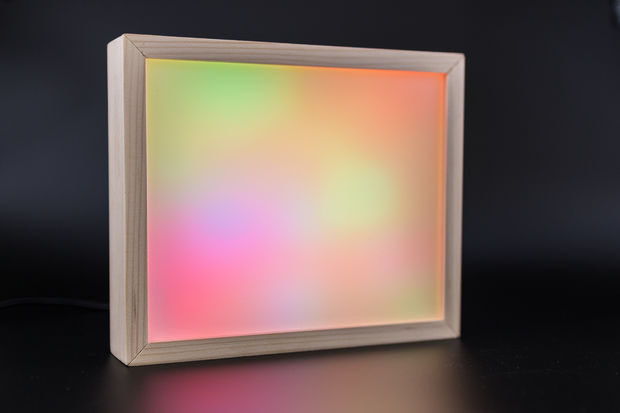
ESP8266 music controlled lightbox
Plug in your LightBox. It should turn blue and you should be able to see a WiFi network called “lightbox” on your phone or tablet. If the box turns red when you first plug it in, you need to reset your ESP8266 module’s EEPROM. Do this by connecting pin 4 of the module to GND for a second. The box should restart and now turn blue.
Connect to the “lightbox” WiFi network with your phone or tablet. Start the LightBox app. The app automatically connects to the LightBox.
In the settings menu, you can configure the LightBox to connect to your own WiFi network instead of creating its own. This way you don’t need to switch to another WiFi network when you want to use your box.
Use the Color Picker to illuminate your room in a color that suits your mood, or use the Audio Analyzer to turn music into beautiful patterns of colors.
Don’t hesitate to ask in the comments section if you have any questions.
Have fun!
The post ESP8266 LightBox lights up in rhythm with your music appeared first on Embedded Lab.